
996 Bose Subwoofer - Retaining with New Amplifier '99 - '04
When adding an aftermarket amplifier to a 996 with a Bose subwoofer, the Bose subwoofer must be wired in series with the door subwoofers. This is accomplished at the factory amplifier wiring harness. Remove your factory amplifier and cut the large plug off of the amplifier harness. Note: be careful of the thick power circuits in this harness. They are live and carry battery power. The colors are: Brown (-) and Red/Blue (+). Your new amplifier kit will come with a short length of speaker wire already attached to it. The subwoofer channel (channel 5) will power both door subwoofers as well as the Bose subwoofer in the (passenger side foot well in a Cabriolet or behind the rear seats in a coupe). 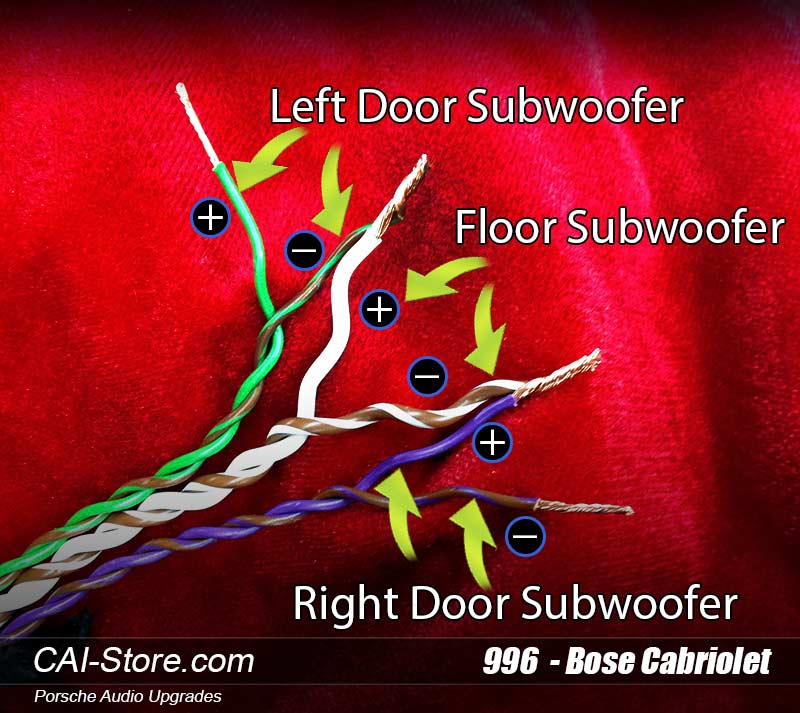
Configuration
In the above picture you can see how the 3 woofers will be combined. The two middle connections where the green/brown connects to the white and the white/brown connects to the violet should be soldered and insulated with tape or heat shrink. Once connected to each other there will not be anything else connected to them. The green (left door woofer positive) will connect to your amplifier's channel 5 positive output. The violet/brown (right door woofer negative) will connect to your amplifier's channel 5 negative output.
- Green - Positive channel 5
- Violet/Brown - Negative channel 5
- Green/Brown & White junction solder and insulate
- White/Brown & Violet junction solder and insulate
Re-Routing the Factory Amplifier Harness
Some models of 911s have the amplifier mounted in the front left corner of the trunk in front of the spare tire. If your amplifier is located in the front corner, you will need to re-route the factory amplifier harness. Look under the black carpet liner in the trunk and you will find that the amplifier harness runs from the amplifier location back up to the firewall behind the brake booster. At this point the harness runs through a grommet and into the car. Locate the wire tie fasteners that hold the harness to the body of the car and cut them to release the harness up to just in front of the brake booster. Then re-run the harness in front of the brake booster and to the right side of the car, closer to the location of your new amplifier. It is best to remove the trunk liner entirely and then reinstall it after the harness has been re-routed.
Below is an example of an '03 996 C4. The C4 trunk layout is very different than the layout of a C2 body. With a C4 you will want to first remove the four 10mm cap nuts that hold the black plastic dome down in the center of the trunk.

Next remove the plastic cover that surrounds the brake booster, and remove the front portion of the trunk liner. Then proceed with removing the rear section of the trunk liner that covers the portion of the trunk closest to the battery compartment.


Finishing Up
Once connected to the speaker lead from the aftermarket amplifier it should look something like this. Notice that the factory power circuits have been insulated and the two subwoofer junctions are insulated as well.
Subwoofer crossovers for channel 5 should be set to low pass at 200hz and if your amplifier has a subsonic filter, it should be set to 30hz. Dash and rear speakers should bet set to a high pass of 200hz.
Note: the speaker leads to your new aftermarket amplifier may be different colors than the ones pictured.
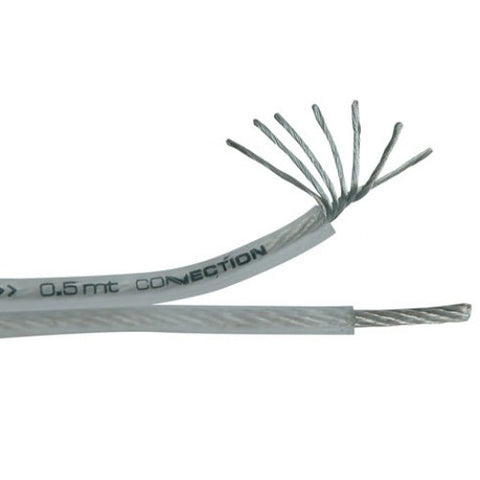
About Audison Connection Brand Speaker Wire UPDATE
We now use 14 gauge silver clad oxygen free copper speaker wire for the 5th channel subwoofer output. This is some of the finest speaker wire available. If you don't know what to look for, it can be difficult to tell which conductor on this speaker wire is positive and which is negative. The positive side is marked with writing and the negative side is marked with tiny "-" symbols. Connect the positive side of this cable to the left door woofer "+" (Green). Connect the negative side of the cable to the right door woofer '-" (violet/brown). Connect the Bose subwoofer speaker wires to the remaining door woofer wires as illustrated above.